It was Christmas today for me! …assembly and ground testing and reserve packing…tomorrow prop tape! ![]()

Paul and Zach, I am very impressed with the build quality and design. Great work!
Bill
It was Christmas today for me! …assembly and ground testing and reserve packing…tomorrow prop tape! ![]()
Paul and Zach, I am very impressed with the build quality and design. Great work!
Bill
I had my first SP140 flight today…it was at the beach with about a 7 mph breeze from the SE. It was amazing…so much fun. It exceeded all of my expectations…no vibration, MUCH quieter than the gas units that I have flown and my X4 and more power than my Air Conception Tornado 280. This is going to be a fun machine to fly. I was extremely comfortable cruising, and I felt very relaxed and safe. My biggest challenge with it will be mastering the power on takeoff. I was in “sport” mode and the torque to the right is very noticeable if you are not smooth enough bringing on the power. I’m not worried, because it is a new beast, and I will eventually get better with it.
I’m close to a 200# pilot with my gear, and the factory location of the hang points was almost perfect for me. My instructor and friend is about 145#s, so I moved the hang points back towards the frame 1". It was perfect for him…I was expecting it not to be…but we didn’t run into any of the weird geometry going on in one of the other OpenPPG threads. One thing that may be different is that my Dudek hang point straps are very tight up against the sides of the hang point rings.
I got in very late, so, I’ll try to post some videos in the next 2 or 3 days.
Thanks, Paul and Zach!! This is for sure the future! It was a Great Day!!
Bill
My first flight…not pretty!! ![]() I had to stop during the launch and re-kite the wing…I was not expecting the amount of torque from not applying the throttle smoothly enough. I was nervous…everything was new and different from what I normally fly…just need more flights.
I had to stop during the launch and re-kite the wing…I was not expecting the amount of torque from not applying the throttle smoothly enough. I was nervous…everything was new and different from what I normally fly…just need more flights.
I love this machine…and will eventually master the throttle (which was in the sport mode). No vibration…much quieter than flying ICE motors…more power than you would ever need. It is the future.
Bill

Short report from yesterday. My instructor is about 145lbs, and he flew my SP140 (3 blade) on a Mojo 24. He climbed to 5240’ and continued to cruise around for 51 minutes. When he landed, the battery was on 83.1V. he could have cruised around a bit longer.
Bill
Report for today: I put my 140 into “Chill” mode and had a nice and easy reverse launch at out beach LZ. “Chill” mode is the ticket for getting started. The flight was 40 minutes, and I was down to about 83 volts. In Sport mode my 140 is a Beast… I need to Slowly work into it. Also, because of those “no” wind days, I’m probably going to order a “30” minute battery. The 60 minute battery is amazing…but it would be nice to launch with a lighter unit at times…30 minutes would be great since I still love flying my X4. Video with sharks to eventually follow!
Bill
I let my instructor at flyhighparamotors.com try out my SP140. Robbie weighs about 145 lbs, so, I moved the rings back about 1" from the “factory” position …worked perfectly.![]()
Here is his review:

My instructor, Robert Marozsan, of flyhighparamotors.com flying my OpenPPG SP140 on a beautiful sled ride from 5,250 feet!! The launch was a no/low wind launch with the 140 in “Sport” mode. Sit back and enjoy the ride…really beautiful!! Bill

As Fred Randall says in one of my favorite movies, Rocketman, “It wasn’t me!” this time…probably will be next time. My cage developed a flat spot about 9" long after riser lines got caught in the prop and pulled across it at the end of an abort. Pilot should have used “Chill” mode… Anyway, when I got home, I took some 3/4" plywood and made this contraption to carefully put the curve back into the bent section of cage. It worked perfectly…this time!  I ended up not using the 2 screws marked with the green arrows. This end of the form needed to pivot down to allow for additional pressure. The aluminum springs back some once the pressure is released. It took several gradual pulls and resets to finally put the curve back into the section. I am a happy camper now! Bill
I finally got some time to work on videos again. Here is the FPV view of my first flight…I really love this machine!! ![]()
Happy Flying!! ![]()
Bill

I finally returned home and had time to finish my “Carrier”. It is basically a copy of my Aviator carrier…less the gas tank holder and the seat. I like it!!
![]() Bill
Bill
Skip to the end of the album for the pics:
Nice job on the carrier, let us know how it works out on the transport.
Mike
Can you describe the process you undertook in creating that carrier? I understand you modeled it somehow using the white material, did you subsequently use that model to weld the final form?
I built a model because it is very easy to make changes with Dollar Tree foam board and a hot glue gun.![]() It was also easy for me because I have built a bunch of Josh Bixler’s foam board plane designs from FliteTest. http://www.flitetest.com
It was also easy for me because I have built a bunch of Josh Bixler’s foam board plane designs from FliteTest. http://www.flitetest.com
Once I finished adjusting the model, I copied it in steel. Hopefully, I will have it painted and a picture posted tomorrow.![]()
This carrier design is the best that I have run across. The one that I purchased from Aviator for my Tornado uses this “hook and pins” design. It is so quick and easy to mount and unmount the motor on the carrier. More time to fly! ![]() Bill
Bill
Small community. Josh took the Flighttest crew to aviatorppg in Florida to learn to fly a few years ago. That video is the one that got me interested in ppg.
Same here. I believe that Paul is friends with Josh, and I have suggested that they eventually do a video at Edgewater Airpark. It was good for Aviator…it should be good for OpenPPG. I have plans to go fly at Edgewater and also with Paul and Zach one of these days. It will be good to meet some of the people who have helped to changed my life! Bill
Bill
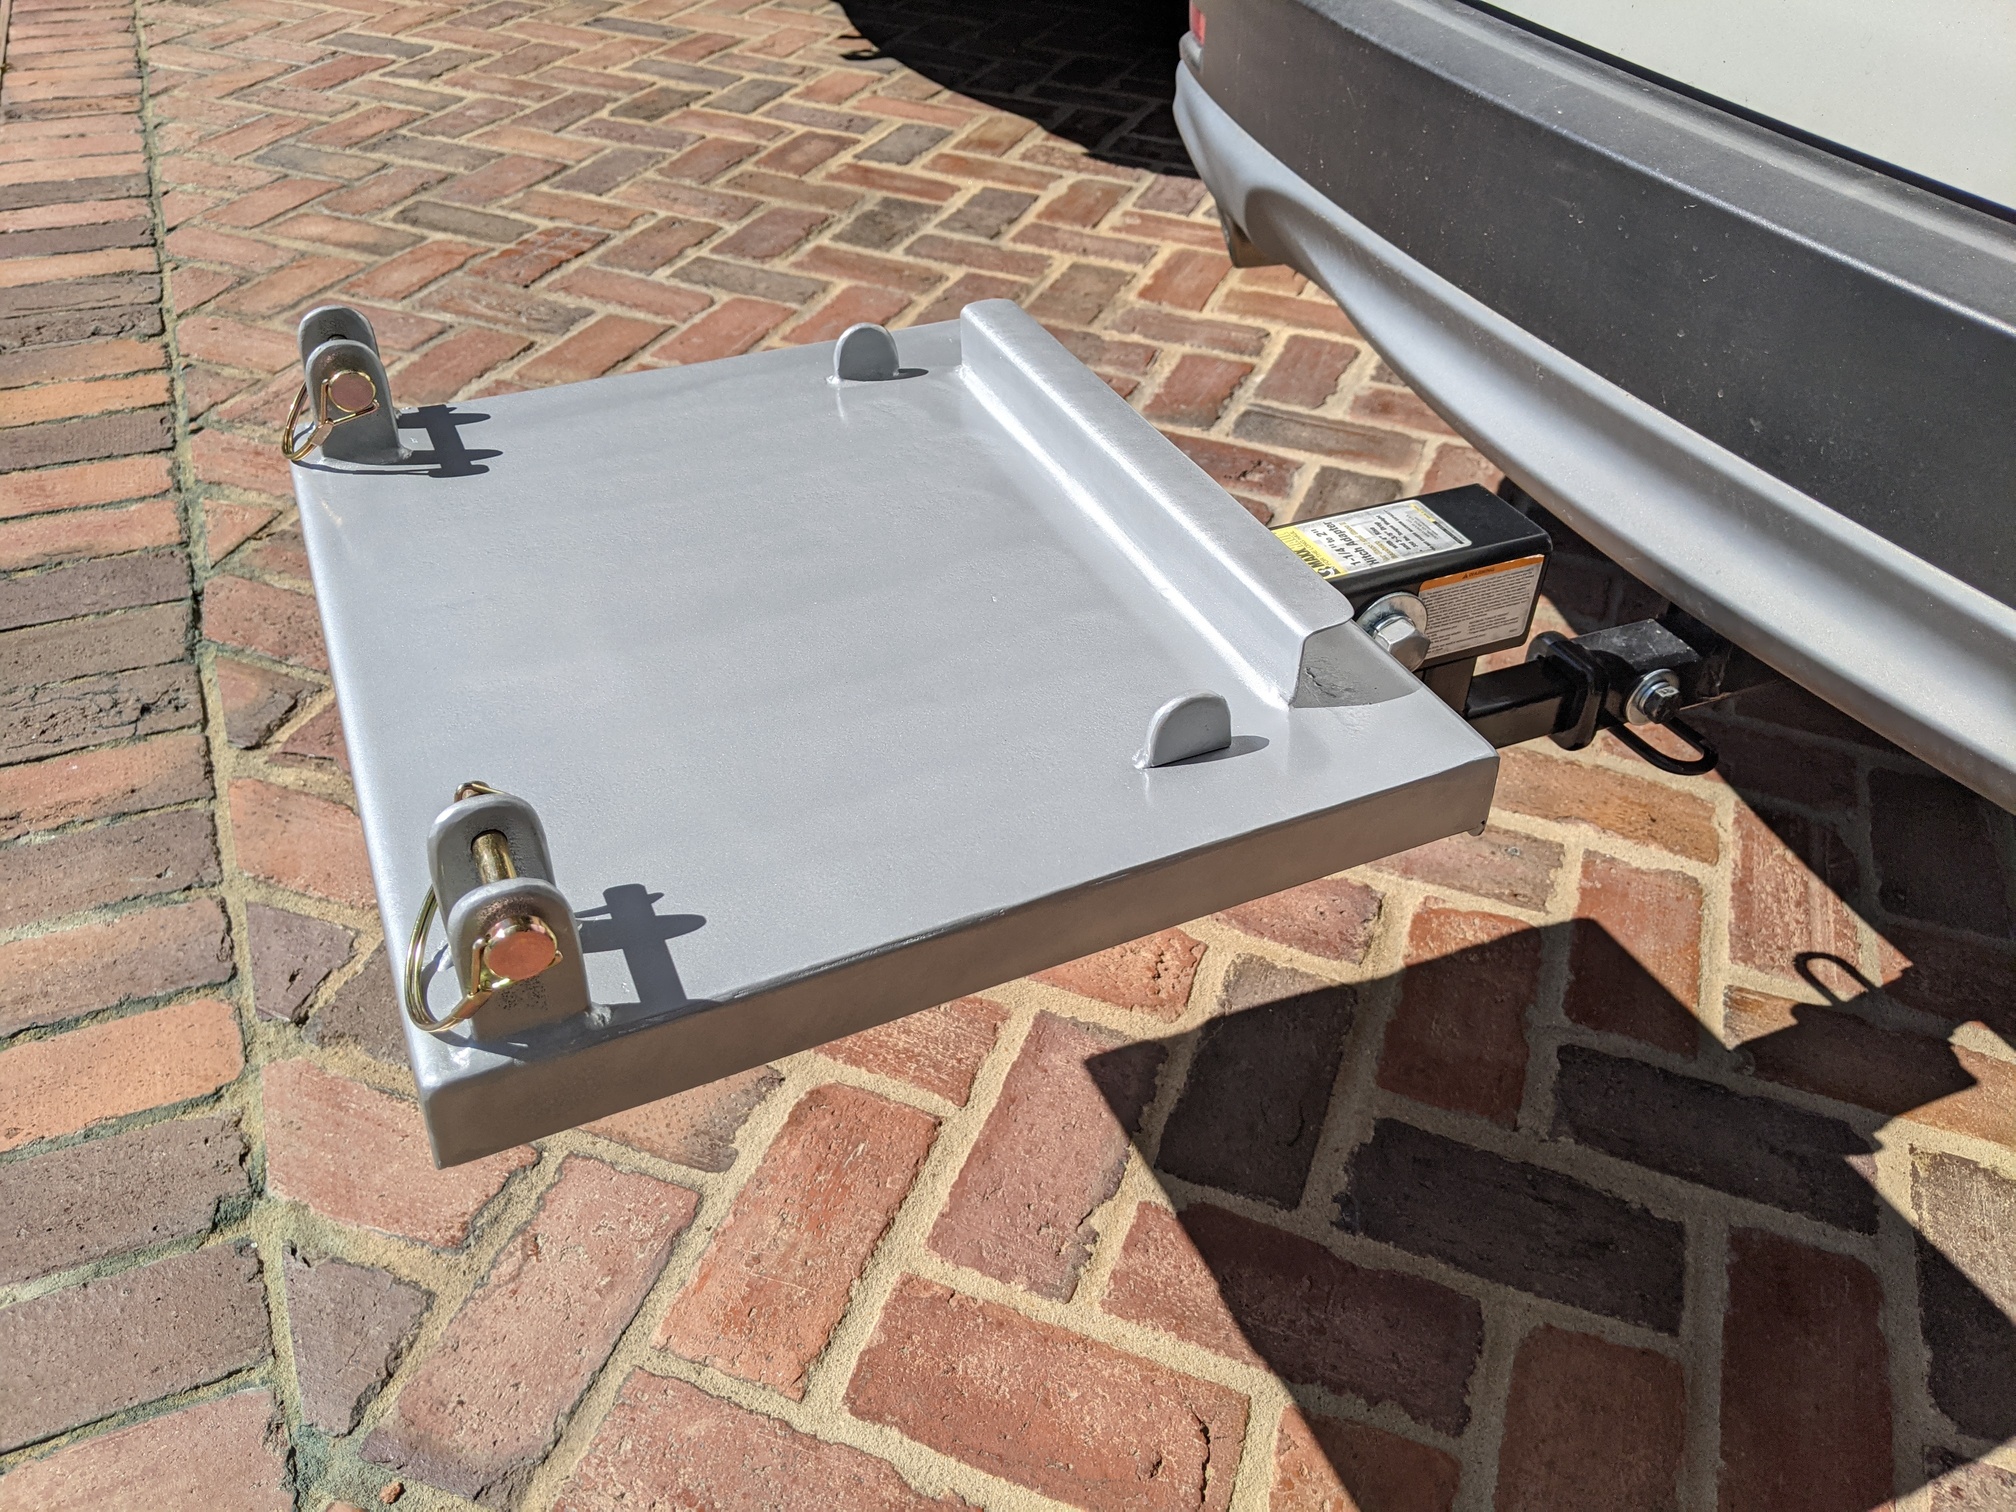
Here is my finished SP140 carrier. Since I used threaded bolts instead of pins, it is solid as a rock. I wish all hitch inserts were threaded…it takes a minute more to use a bolt, but it is well worth the time required. The “anti-rattle” devices sold on Amazon take more time to install, and the last ones that I bought were junk.
The beauty of this carrier design is that it takes about 20 seconds to lift up the paramotor into place and insert two 3/8" pins…SO easy and quick. I never use the seat on the Aviator carrier that I have; therefore, I removed it from this design. In the first photo I had not yet added the 1/8" rubber pad to key areas. Everything is Very snug and nothing rattles! 
Zoom in and you will be able to see the detail. This morning I did drill the end of the bolts and add wire “hitch clips” for an additional safety. It was absolutely worth the effort to design and build this carrier!
Bill
Love it! Great job Bill!
Looks great. Nice job on the carrier.
Looks great. Tell the truth - where did you buy it