I purchased a pre-built batch 3. After a dozen flights I was ready for some upgrades. I followed Paul’s @GliderPilot build closely (https://community.openppg.com/t/paul-b-braedin-b-gliderpilot-glydrfreak-flights-build-modifications/559). Paul, thank-you very much for including your designs and detail! I did the following mods:
- Reinforcing Connectors (for the hoop)
- Pre-Charge Knob
- Surface mount XT-150 plugs
- Harness Strap Standoff
- Battery Rails
- Arm Quick Latch
- 6 Battery Wiring w/ leg battery rails
- ESC Capacitor Holders
- Completely re-wired
- Shortened Battery Leads
- Goose neck bar Power Meter Mount (more below)
After the rewiring I ended up loosing 48.8 inches of wire (even adding the 5th and 6th batteries).

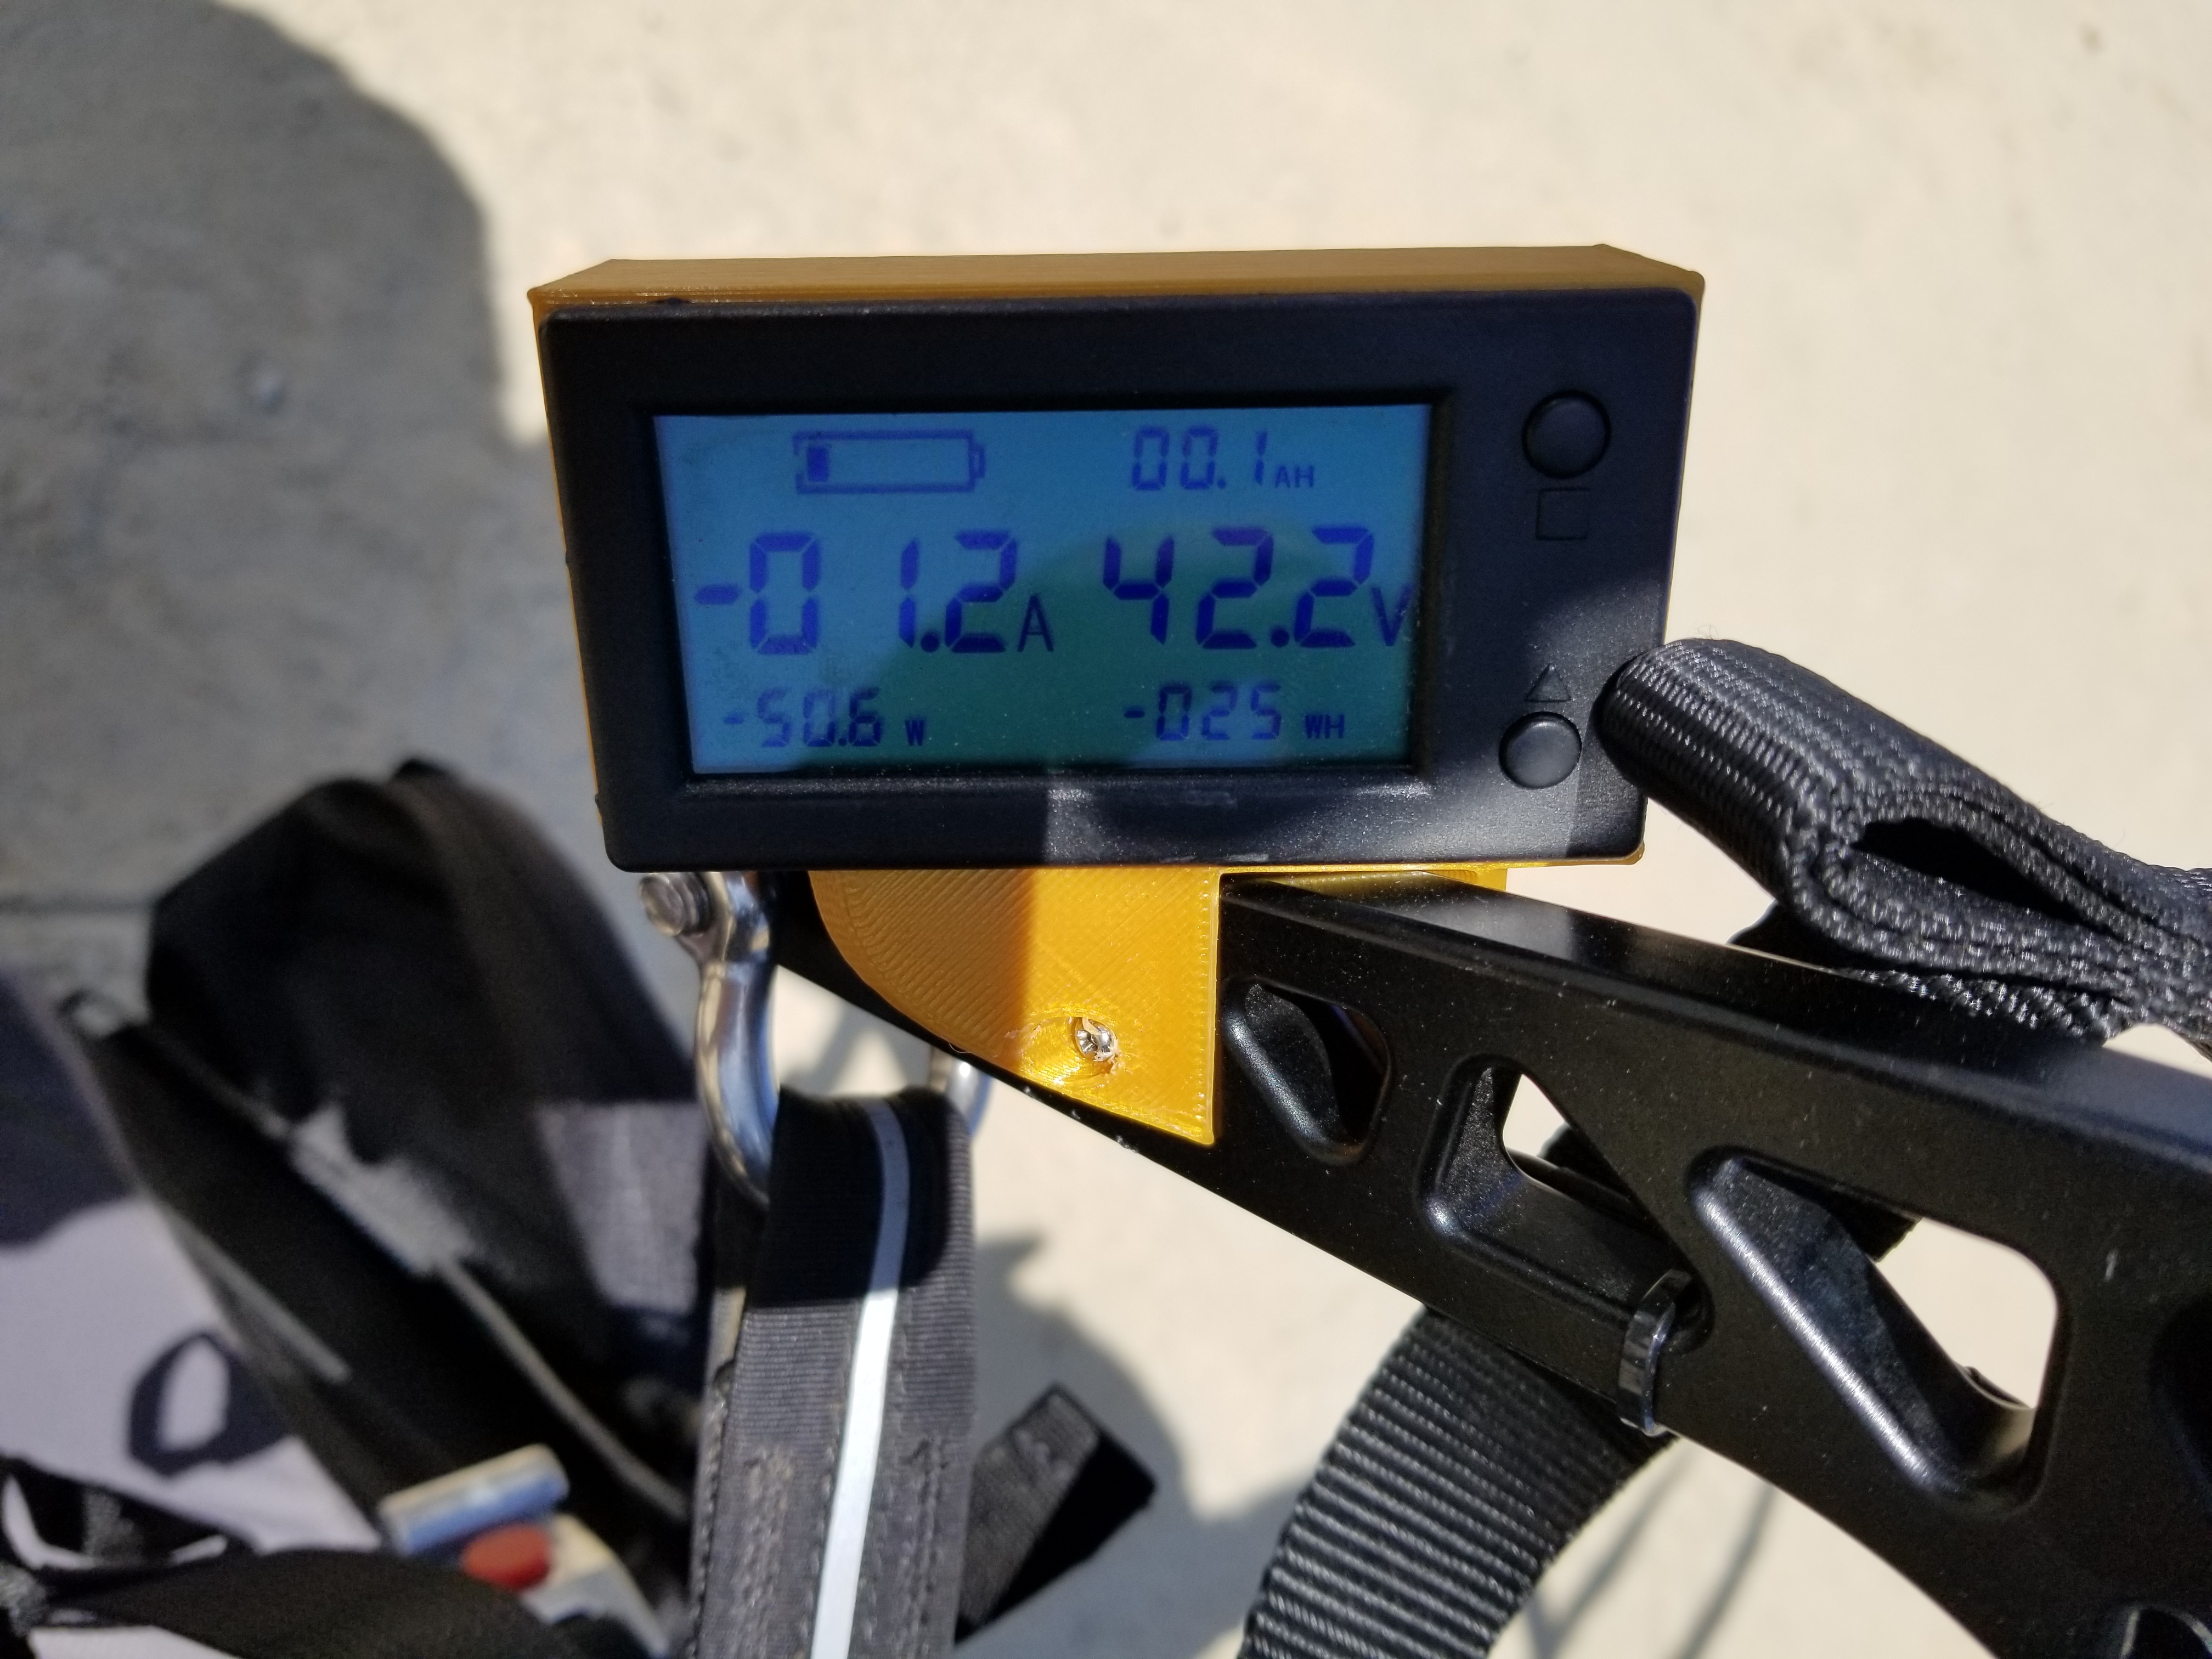
I wanted a power meter, not just an amp meter, so I purchased one that allows me to track cumulative watt-hours and amp-hours consumed during the flight. Plus I installed it at the battery, so I could track exactly how much is coming out of the battery (not just consumed by one motor/ESC). With the pre-wired split electrical system (2 batteries connected to 2 ESC’s), I found that I almost over-drained 2 of the batteries because I couldn’t see their voltage (the controller only showed the voltage on one pair of batteries). Those two batteries were drained to 3V per cell (the other set were at 3.2V).
Here’s the one I purchased:
https://www.amazon.com/gp/product/B07B4CWKRJ
Here’s the STL for the mount:

Watt Meter.stl (237.2 KB)

